Dark field illumination uses light at very shallow angles so that only surface irregularities, such as scratches or dust, reflect light toward the camera. This method holds high value for machine vision in 2025, where the importance of lighting continues to grow due to challenges like glare, inconsistent reflections, and the need for precise defect detection. Manufacturers now rely on advanced dark field illumination machine vision systems, including new types of machine vision lighting and miniaturized LEDs, to achieve reliable inspections and meet rising industry standards.
Key Takeaways
- Dark field illumination uses low-angle light to highlight small surface defects like scratches and dust by making the background appear dark.
- This lighting method works best on reflective, transparent, or textured surfaces and helps detect tiny flaws that bright field lighting often misses.
- Proper setup requires careful positioning of lights close to the object and adjusting angles to reduce glare and improve defect visibility.
- New technologies like flat dome lights and advanced LEDs improve dark field lighting by providing more even and flexible illumination.
- Testing different lighting setups and combining dark field with other lighting methods can optimize inspection accuracy and product quality.
Principles
How Dark Field Illumination Works
Dark field illumination uses a special lighting approach to reveal fine surface details. The system directs light at a low angle, usually less than 45 degrees, across the object’s surface. Most of this light reflects away from the camera, so the background appears dark. Only features like scratches, edges, or dust scatter the light back toward the camera. This effect makes defects stand out clearly against a dark background. The method relies on the physics of light reflection, where the angle of incidence equals the angle of reflection. By using this principle, dark field illumination highlights small imperfections that bright field lighting often misses.
Tip: Dark field illumination works best for detecting tiny flaws that are hard to see with direct lighting.
Lighting Geometry and Angles
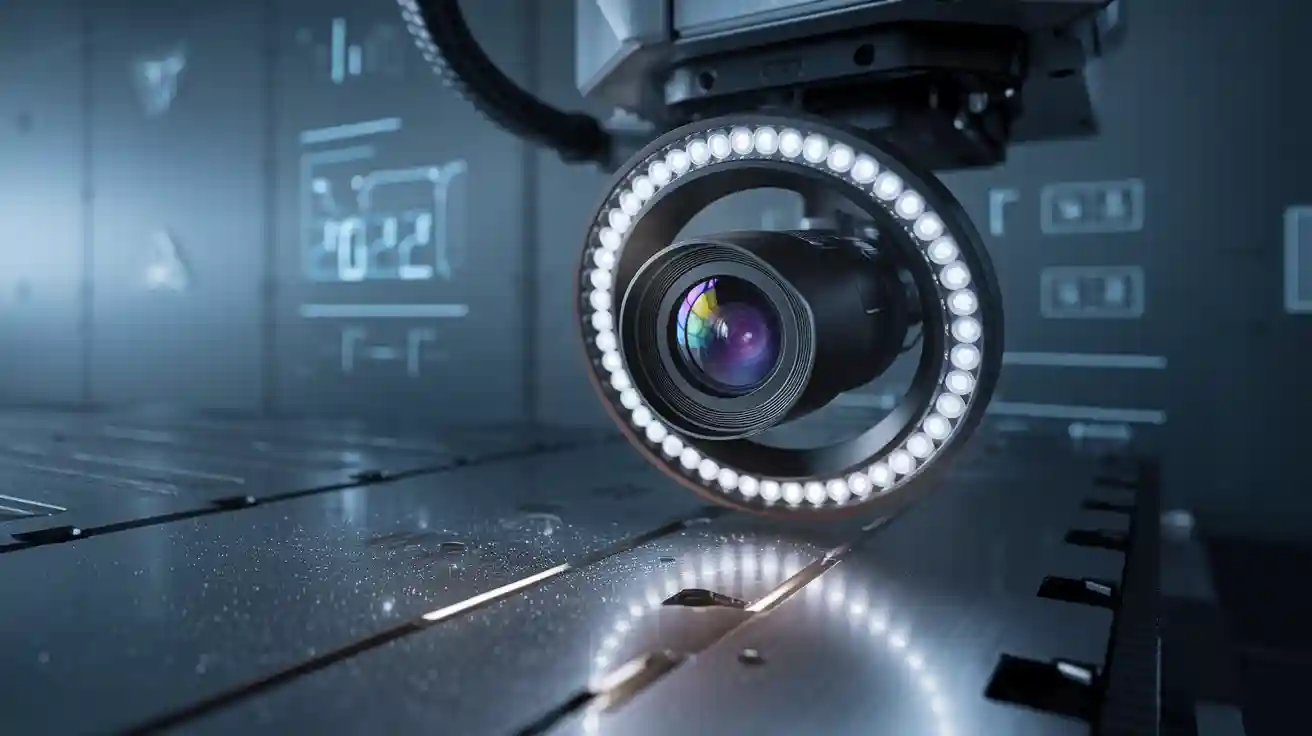
The geometry and angle of lighting play a critical role in the performance of dark field illumination. Lighting at very low angles—sometimes as shallow as 10 to 15 degrees from the surface—ensures that most light does not enter the camera directly. This setup creates a strong contrast between the dark background and any surface features that scatter light. Engineers often use circular ring lights or linear bar lights, depending on the shape of the object and space constraints. Adjusting the angle and geometry helps eliminate glare and improves the visibility of fine details, especially on reflective or mirrored surfaces. The working distance and the solid angle of the light source also affect how well the system detects defects.
Key Components
A successful dark field illumination setup requires careful selection and arrangement of several components:
- Specialized lighting, such as circular or linear/directional dark field illumination lights, designed for low-angle use.
- Precise positioning of the light source close to the object’s surface to achieve the desired effect.
- Customizing the lighting design based on the object’s surface—whether it is matte, shiny, or mixed.
- Considering the physical layout, including camera, lens, and lighting access, as well as the size of the inspection area.
- Analyzing the sample’s surface properties to choose the right lighting intensity and configuration.
- Testing different lighting setups in the actual environment to optimize contrast and feature detection.
- Integrating the lighting design early in the machine vision system development for the best results.
Dark Field Lighting in Machine Vision Applications
Edge and Surface Defect Detection
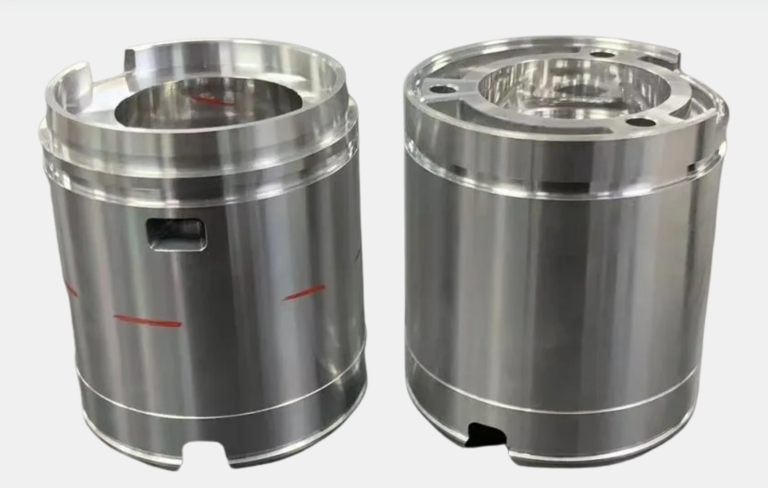
Dark field lighting plays a vital role in edge and surface defect detection. Engineers use this technique to highlight scratches, dents, and cracks by shining light at a shallow angle. The low-angle illumination causes only raised or indented features to reflect light back to the camera. This method creates strong contrast, making even tiny anomalies visible. In 2025, electronics manufacturers rely on dark field inspection to reveal imperfections on shiny or curved parts. Unlike other types of machine vision lighting, dark field lighting emphasizes edges and surface irregularities, which helps image analysis software detect defects with high accuracy. Structured illumination methods, such as dark-field structured illumination microscopy, further improve sensitivity and resolution. These methods separate defect signals from background noise, allowing for precise 3D reconstruction of surfaces without damaging the sample.
Note: Dark field lighting works best for detecting surface defects that involve height or depth changes, such as scratches, marks, or pits.
Transparent and Reflective Objects
Dark field lighting excels at inspecting transparent and reflective objects. When inspecting glass, polished metal, or clear plastic, this technique makes the main surface appear dark while defects like cracks or imprints reflect light into the camera. This approach highlights flaws that standard illumination often misses. Recent research shows that combining dark field lighting with other light sources increases defect visibility on transparent materials from 40% to over 90%. This improvement supports real-time inspection in industrial settings. Image analysis software can then identify both scattering and absorbing defects quickly. Dark field lighting is not suitable for opaque objects, but it remains the preferred choice for transparent and highly reflective surfaces.
Typical Use Cases
Many industries benefit from dark field lighting in machine vision applications. Common use cases include:
- Detecting micro scratches and blemishes on aerospace components.
- Inspecting packaging films and seals in the food and beverage industry.
- Revealing seams and imperfections on packaging materials.
- Examining mirrored or specular surfaces where glare from bright field lighting would obscure defects.
These examples show how dark field lighting supports quality control and defect detection across different types of machine vision tasks. By highlighting subtle anomalies, this technique ensures that products meet strict industry standards.
Pros and Cons
Main Advantages
Dark field illumination offers several important benefits for machine vision systems. This technique increases the contrast of surface defects by capturing only the light scattered from small features. Most of the light reflects away from the camera, which reduces glare and hotspots that often appear with bright field lighting. As a result, engineers can inspect reflective or shiny surfaces, such as mirrors or polished metals, with much greater accuracy.
- Enhanced defect visibility: Dark field lighting reveals fine details like scratches, seams, and pits that bright field methods often miss.
- Reduced visual noise: The system minimizes direct reflections, which helps image analysis software focus on true defects instead of background glare.
- Flexible configurations: Circular and linear dark field lights allow users to tailor the setup for different object shapes and inspection needs.
- Improved quality control: Manufacturers can detect even the smallest surface irregularities, ensuring products meet strict standards.
Tip: Dark field illumination works best when the light source sits close to the object and shines at a low angle.
Limitations
Despite its strengths, dark field illumination also presents some challenges. The technique requires precise alignment of the light source and camera. If the angle or distance changes, the system may miss defects or create uneven lighting. Dark field lighting does not work well for opaque objects or surfaces without height differences. Flat, matte surfaces may not scatter enough light to reveal flaws.
| Limitation | Description |
|---|---|
| Alignment sensitivity | Small changes in setup can affect defect visibility |
| Limited object types | Less effective for opaque or non-reflective materials |
| Surface dependency | Works best on surfaces with height or texture changes |
| Setup complexity | Requires careful positioning and testing |
Engineers must test and adjust the lighting setup for each application. They should also consider combining dark field with other lighting techniques to cover a wider range of inspection tasks.
Advances in Dark Field Illumination Machine Vision System
New Technologies in 2025
In 2025, engineers continue to refine the dark field illumination machine vision system to meet new inspection challenges. Many systems now use flat dome lights instead of traditional ring lights. Flat dome lights provide even, shadow-free illumination, which helps reduce unwanted shadows that can confuse image sensors. This approach improves contrast and flexibility in setup. For example, a ring light dark field setup can detect features like gear teeth and printed characters with clear contrast. However, linear dark field setups may not always deliver enough contrast for reliable detection. Manufacturers now prefer flat dome lights for their ability to create more uniform lighting and reduce the risk of missed defects. These improvements make the dark field illumination machine vision system more adaptable for different surfaces and inspection tasks.
LED and Ring Light Innovations
Recent years have seen several innovations in LED and ring light technology for highly effective dark field illumination. New product series, such as MicroBrite™ DF198 and DF196, offer both diffuse and directional low-angle illumination. These lights enhance defect detection on reflective flat surfaces and improve contrast for surface flaws. The table below highlights key features:
| Innovation/Product Series | Key Features | Impact on Dark Field Illumination in Machine Vision |
|---|---|---|
| MicroBrite™ DF198 Series | Diffuse low-angle illumination, casts shadows to highlight surface defects and embossed text | Enhances defect detection on reflective flat surfaces by providing diffuse lighting |
| MicroBrite™ DF196 Series | More directional dark field illumination | Provides direct low-angle lighting for improved contrast on defects |
| General Dark Field Lights | Illumination at 45 degrees or less, suitable for reflective flat surfaces | Creates contrast by scattering light from defects, improving detection accuracy |
| Deployment Notes | Very low angle ring lights require close working distances | Ensures effectiveness in detecting subtle surface defects |
Manufacturers also introduced new solutions for complex shapes. For example:
- OPT Machine Vision developed a patented curved surface imaging system using a high-intensity C-shaped LED ring light. This system provides uniform illumination on curved parts and removes blind spots.
- AI-powered defect classification now works with these systems to improve accuracy for scratches, dents, and coating flaws.
- Time-division strobe technology synchronizes 8K cameras with multi-angle illumination, allowing both bright-field and dark-field imaging in one scan.
These advances help the dark field illumination machine vision system deliver faster, more accurate inspections across a wider range of applications.
Practical Guide to Machine Vision Lighting
Selecting the Right Setup
Choosing the right dark field illumination machine vision system starts with a careful review of the inspection environment. Engineers should follow these steps to ensure the best results:
- Analyze the physical environment: Check for space constraints, working volume, and access for the camera, lens, and lighting. Make sure the setup fits the available area and allows for easy adjustments.
- Consider part characteristics: Identify if the part moves or stays still, its speed, vibration levels, and how consistently it is presented. These factors affect lighting stability and image quality.
- Evaluate ergonomics and safety: Ensure the lighting does not create hazards for operators. Check if the intensity or strobing could cause discomfort or safety issues.
- Examine sample and light interactions: Look at the surface properties, such as reflectivity, geometry, and texture. Flat, curved, or mixed surfaces may need different lighting angles or types.
- Assess sample composition and color: Note if the part is metallic, non-metallic, transparent, or colored. Some materials may require specific wavelengths or filters.
- Identify ambient light contamination: Find and reduce stray light from other sources that could interfere with the dark field effect.
- Define features of interest: Decide which defects or features need inspection. Tailor the lighting to maximize contrast for these areas.
- Apply the four cornerstones of vision illumination: Focus on geometry, light structure, wavelength, and filters to optimize contrast and robustness.
Tip: For circular dark field lighting, keep the light source close to the sample. Match the light’s spectral output to the camera sensor’s sensitivity for the best results.
Optimization Tips
Engineers can improve the performance of a dark field illumination machine vision system by following these optimization steps:
- Test two or three lighting types and techniques on a bench before installing them on the production floor.
- Start the inspection system design with the lighting solution. Build the rest of the system around the lighting to achieve the best results.
- Balance ergonomic, cost, efficiency, and consistency needs when selecting lighting.
- Choose the right color temperature to enhance the visibility of defects and improve the accuracy of image analysis software.
- Adjust lighting intensity using dimmers or controllers to prevent overexposure or underexposure.
- Set camera exposure time and light intensity together to ensure clear images without losing detail.
- Use diffusers and filters to scatter light, reduce harsh reflections, and boost image contrast.
- Regularly calibrate the camera for dark signal non-uniformity (DSNU) to reduce noise and improve defect detection.
- Select light colors or wavelengths that match the material under inspection. This step helps highlight features that might otherwise go unnoticed.
- Adjust the angle of illumination to minimize glare and maximize the visibility of surface details.
Note: Always test lighting setups under real application conditions. This practice helps catch issues early and ensures reliable machine vision imaging.
Troubleshooting
Even with careful planning, issues can arise in dark field illumination machine vision systems. Common problems and solutions include:
- Glare and reflectivity issues: If glare or specular reflections appear, adjust the lighting angle or use polarizers to direct reflections away from the camera.
- Non-uniform illumination: Uneven brightness can hide defects. Try multiple lighting angles or combine shadowless and shadow-casting lights for better coverage.
- Contrast management: Too much contrast or glare can obscure details. Use diffusers or filters to balance the image.
- Integration challenges: Precise positioning is key. If defects are missed, check the alignment of the light source, camera, and sample.
- Late lighting integration: Address lighting early in the design process to avoid costly changes and delays.
- Wrong light color: The color of the light affects defect visibility. Use white light for flexibility or select a color that contrasts with the part.
- Camera and lens effects: Wide-angle lenses can cause distortion. Compensate for this in the lighting design.
Troubleshooting Steps Table
| Problem | Solution |
|---|---|
| Glare or image saturation | Adjust lighting angle, use polarizers |
| Uneven illumination | Add more lighting angles, use diffusers |
| Missed defects | Re-align light, camera, and sample; check for ambient light interference |
| Poor contrast | Adjust intensity, use filters, select proper light color |
| Sensor noise or artifacts | Perform flat-field correction, calibrate camera |
Tip: Flat-field correction improves image uniformity and reduces artifacts. Capture a reference image under controlled lighting, subtract sensor noise, and apply correction algorithms. This process makes it easier to spot defects and reduces manual adjustments.
Engineers should also manage ambient light, maintain consistent part orientation, and regularly review the physical environment for changes. These steps help keep the dark field illumination machine vision system running smoothly and ensure high-quality machine vision lighting for every inspection.
Comparing Lighting Techniques

Dark Field vs. Bright Field
When engineers compare dark field lighting to bright field illumination, they notice clear differences in how each method detects defects. Dark field lighting uses low-angle light to highlight small scratches and edges, especially on reflective surfaces. Bright field illumination, in contrast, shines light directly onto the object, making it better for general inspection and patterned defect detection.
The table below summarizes the main differences:
| Aspect | Dark Field Illumination (DF) | Bright Field Illumination (BF) |
|---|---|---|
| Sensitivity to Small Defects | Higher sensitivity; better contrast for small defects | Less sensitive to small defects |
| Macroscopic Defect Description | Less clear | Provides clearer descriptions |
| Patterned Defect Detection | Not sufficient alone; may miss defects at certain angles | More suitable; better resolution for patterns |
| Detection Resolution (nm) | ~180-185 nm (varies with angle) | ~168-169 nm (better resolution) |
| Background Noise | Can cause interference, especially on transparent substrates | More suitable for transparent areas |
| Application Suitability | Best for small defects and reducing glare on reflective surfaces | Better for comprehensive and patterned defect detection |
Tip: Combining both lighting methods often gives the best results for challenging inspection tasks.
Choosing the Best Method
Selecting the right lighting technique depends on several factors. Engineers must consider the surface properties, inspection environment, and the types of machine vision tasks required. Dark field lighting works well for detecting small flaws on shiny or mirrored surfaces by capturing scattered light and avoiding glare. Bright field lighting suits flat or slightly curved surfaces and provides strong contrast for general inspections.
Key factors to evaluate include:
- Analyze the inspection environment, including space and camera access.
- Check if the part moves or stays still, and note its speed.
- Consider safety and comfort for operators.
- Study how the sample interacts with light, focusing on reflectivity and texture.
- Look at the material’s composition, color, and transparency.
- Identify any ambient light that could affect results.
Testing different setups helps engineers find the best lighting geometry and wavelength for each application. By matching the lighting method to the inspection task, teams can improve defect detection and product quality.
Dark field illumination stands out in machine vision for 2025 by maximizing contrast on edges, textures, and small defects while minimizing background reflections.
- This method uses low-angle lighting, making it essential for inspecting mirrored or textured surfaces where bright field lighting fails.
- The importance of lighting selection remains critical for inspection success.
Professionals should:
- Understand the geometry and type of dark field lighting needed.
- Analyze the inspection environment and part characteristics.
- Test multiple lighting setups before final implementation.
Staying updated on new lighting technologies ensures optimal inspection results.
FAQ
What is the main benefit of dark field illumination in machine vision?
Dark field illumination helps engineers see small defects on shiny or textured surfaces. This method increases contrast, making scratches, pits, and edges stand out clearly for inspection.
Can dark field lighting work with all types of materials?
Dark field lighting works best on reflective or transparent materials. Opaque or matte surfaces may not scatter enough light for effective defect detection.
How close should the light source be to the object?
Engineers should place the light source as close as possible to the object. A short working distance ensures low-angle illumination and maximizes defect visibility.
What are common mistakes when setting up dark field illumination?
Many teams forget to align the light and camera correctly. Some ignore ambient light or use the wrong light color. These mistakes can reduce defect detection accuracy.
Is it possible to combine dark field with other lighting techniques?
Yes. Combining dark field with bright field or diffuse lighting often improves inspection results. This approach helps detect a wider range of defects on complex surfaces.
See Also
Understanding Field Of View In Machine Vision Systems
The Importance Of Lighting Equipment In Vision Systems
Enhancing Machine Vision Systems With Structured Light Techniques
A Comprehensive Guide To Cameras Used In Vision Systems
Exploring Pixel-Based Machine Vision For Today’s Applications