Variance in machine vision systems describes how much results change when measuring the same object under similar conditions. High variance often leads to lower accuracy, poor repeatability, and less reliability. For 2025, tuning model hyperparameters such as learning rate and batch size in machine learning improves variance control, as shown by significant p-values. The following table highlights how variance machine vision system improvements, like batch normalization and calibration, drive better model learning and inspection results:
| Concept | Impact in 2025 |
|---|---|
| Model Hyperparameter Tuning | Strong effect on variance and learning stability |
| Calibration Techniques | Maintains high model accuracy |
| Batch Normalization | Improves model learning and reduces variance |
Key Takeaways
- Variance measures how much machine vision results change when inspecting the same object multiple times, affecting accuracy and reliability.
- Stable lighting, high-quality hardware, and regular calibration reduce errors and improve repeatability in machine vision systems.
- Careful system setup and tuning of model hyperparameters like learning rate and batch size help control variance and boost model accuracy.
- Using standard samples and repeatability tests ensures consistent and reliable measurements across different conditions and equipment.
- Advanced software optimization, including AI and regular monitoring, lowers variance, reduces false positives, and maintains system performance over time.
Key Concepts
Variance Defined
Variance in a machine vision system measures how much results change when the system inspects the same object multiple times. Engineers use variance to understand how stable a model is during learning. When a model shows high variance, its predictions change a lot with small changes in the data set. This can happen if the model learns too much from the training data set and does not generalize well. In machine learning, variance links closely to the bias and variance tradeoff. A model with low bias and high variance may fit the training data set perfectly but fail on new data. Teams must balance bias and variance to achieve reliable learning and accurate prediction.
Precision and Repeatability
Precision and repeatability are key for any variance machine vision system. Precision means how close measurements are to the true value, while repeatability shows how consistent results are when measuring the same object many times. For example, engineers often use a golden sample with known dimensions to test repeatability. If the system gives similar results each time, it has high repeatability. However, high repeatability does not always mean high precision. Calibration helps ensure the model gives correct results. Studies show that image quality, lighting, and software processing affect both precision and repeatability. Sub-pixel precision, achieved through advanced edge detection, improves measurement accuracy. Research comparing machine vision to digital micrometers found similar results, proving the strong link between precision and repeatability in these systems.
Machine Learning vs. Machine Vision Variance
Machine learning and machine vision both deal with variance, but they approach it differently. In machine learning, variance describes how much a model’s prediction changes with different training data sets. The bias and variance tradeoff guides how teams design a machine learning model for the best learning outcome. In machine vision, variance focuses on how stable the system is when inspecting real-world objects. Both fields use large data sets to train and test models, aiming to reduce bias and variance. The learning process in both areas involves tuning the model, selecting the right training data set, and checking results on new data. By understanding variance, teams can improve model learning, boost accuracy, and make better predictions.
Causes

Environment
Environmental factors play a major role in machine vision variance. Lighting changes, shadows, and reflections can make it hard for the system to separate objects from the background. For example, uneven illumination in a video recording chamber increases tracking errors and causes identity swaps. Reflections and occlusions from nearby objects introduce errors, such as truncation or false classification. Studies show that stable lighting reduces variance and improves accuracy. In agriculture, researchers found that the standard deviation of vegetation indices increased from 0.0164 under stable light to 0.058 with variable illumination. This shows that fluctuating lighting conditions create more errors in machine vision data. Regular calibration, such as using digital grid overlays, helps reduce these effects by aligning the system to known standards.
Tip: Consistent lighting and background control lower error rates and improve repeatability in machine vision tasks.
Hardware
Hardware quality and configuration directly affect variance in machine vision systems. Camera resolution, sensor size, and lens quality determine how much detail the system can capture. For instance, a camera with 500×500 pixels can measure features as small as 0.002 inches. Sub-pixel resolution allows even finer measurements, improving accuracy. Lighting hardware, such as dome or ring lights, affects image contrast and glare. Temperature changes can cause parts and hardware to expand or contract, leading to measurement drift. Advanced imaging systems, like 2D e-beam or 3D cameras, provide high precision and help reduce variance. The Gage Capability Index (GCI) measures how much the vision system contributes to measurement variance. A GCI below 0.1 means the system has little negative impact.
Software
Software algorithms also influence variance. Machine vision systems use both rule-based and AI-driven software to process images. Machine learning models need balanced and complete training data to avoid errors. Incomplete data or poor pattern association can lead to misrecognition or false classification. Algorithms must handle complex textures, scale, and pose changes. AI integration allows systems to adapt and improve over time, boosting defect detection and speed. Programmable logic controllers (PLCs) combined with computer vision algorithms increase processing speed and accuracy in industrial settings. Regular evaluation of software performance ensures high accuracy, precision, and repeatability.
Measurement
Repeatability Tests
Repeatability tests help engineers understand how much a machine vision system’s results change when measuring the same object many times. These tests use a controlled data set to check if the system gives similar results each time. The reproducibility coefficient (RDC) measures the smallest difference that can be detected between two repeated measurements with 95% confidence. This approach ensures that the model remains reliable, even when different operators or imaging devices are used. Standardized protocols, such as the VDI/VDE/VDMA 2632 series and EMVA1288, guide the setup of repeatability tests. These protocols define how to create a data set, specify the measurement tasks, and set environmental conditions. Engineers use a training data set to calibrate the model and then test it with new data to check for consistency. Measurement uncertainty also serves as an important indicator of the model’s capability.
Standard Samples
Standard samples play a key role in ensuring repeatability in machine vision systems. These samples have known properties and are used to create a reference data set for testing. By using standard samples, engineers can compare the model’s results across different labs and equipment. The table below shows how ISO standards use standard samples to support repeatability:
| ISO Standard | Material Type | Role of Standard Sample Materials | Controlled Test Parameters | Measured Performance Evidence Supporting Repeatability |
|---|---|---|---|---|
| ISO 527-1 | Plastics | Specifies specimen shapes and test speeds | Constant rate pulling, defined geometry, environmental conditions | Consistent yield stress and strain results across labs |
| ISO 6892-1 | Metals | Defines specimen types and test methods | Test speed, strain rate, temperature control | Reproducible yield strength and elongation data |
| ISO 6507-1 | Hard metals | Standardizes hardness testing | Defined load, optical measurement | Consistent hardness values across materials |
Standard samples help create a reliable data set for both the training data set and validation. This process ensures the model can generalize well and reduces variance.
Data Analysis
Data analysis in machine vision systems uses a variety of statistical tools to evaluate variance. Engineers analyze the data set using descriptive statistics like variance and standard deviation. Homogeneity of variance tests check if different groups in the data set have similar variability. T-tests and ANOVA compare means between groups, helping to identify if the model performs consistently across the data set. Regression analysis explores relationships between variables in the data set, while factor analysis helps reduce complex data. Bayesian methods and machine learning techniques handle uncertainty and non-linear patterns in the data set. The table below summarizes key methodologies for assessing variance:
| Methodology / Metric Type | Description | Purpose in Variance Assessment |
|---|---|---|
| Cross-validation (k-fold, nested) | Splits data set into folds for robust testing | Reduces bias, provides stable model estimates |
| Multiple performance metrics | Measures accuracy, precision, recall, F1-score | Evaluates model variance across classes |
| Statistical tests (Kolmogorov-Smirnov) | Detects data set distribution drift | Identifies changes affecting model reliability |
| Segmentation metrics | Measures overlap in predictions | Assesses spatial variance in model output |
| Generation metrics | Evaluates image quality and diversity | Checks variance in generative model results |
| Real-time monitoring | Tracks data set performance over time | Detects drift and ensures model reliability |
Statistical software tools help automate these analyses, making it easier to interpret results and improve the model. By using a well-structured data set and proper analysis, engineers can ensure the model remains accurate and reliable, even as the data set changes over time.
Variance Machine Vision System Control
Hardware Choices
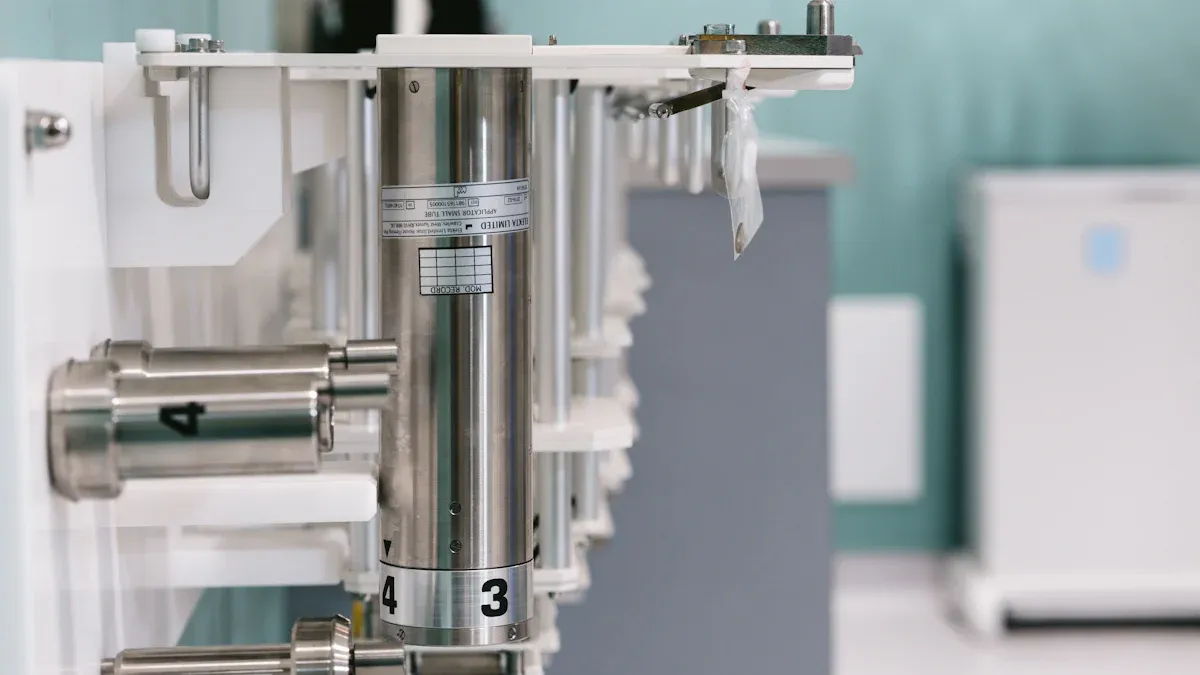
Selecting the right hardware forms the foundation of a stable variance machine vision system. High-quality cameras, lenses, and lighting equipment reduce measurement errors and improve repeatability. Telecentric lenses help maintain consistent magnification, which is critical for accurate measurements. Consistent and uniform lighting, such as dome or ring lights, minimizes shadows and glare. Temperature-stable components prevent drift in measurements during long production runs. Teams often start with small, incremental hardware upgrades in specific areas. This approach builds confidence and allows for scalable improvements. Companies that invest in robust hardware see fewer system failures and lower operational costs. Automated inspection systems also reduce human error and support consistent quality.
Tip: Upgrading IT infrastructure and preparing teams for new operational paradigms ensures that advanced AI platforms can function efficiently.
System Setup
Proper system setup directly impacts the performance of any machine learning model used in a variance machine vision system. Engineers must carefully align cameras, fixtures, and lighting to ensure that every image in the data set is consistent. Stable mounting and precise positioning of parts reduce unwanted movement and measurement variation. Automated alignment tools and real-time feedback mechanisms detect and correct misalignments instantly, improving accuracy and operational efficiency. Cross-validation methods, such as K-fold and nested cross-validation, help evaluate model performance and reduce overfitting. Prioritizing key hyperparameters like learning rate and batch size during setup has a strong effect on model accuracy and variance control. Automated hyperparameter tuning tools, such as Optuna or Ray Tune, outperform traditional search methods and adapt to dynamic workloads. Regular experimentation and refinement of these parameters keep the system optimized for changing production needs.
Best Practices for System Setup:
- Use automated alignment and feedback systems.
- Prioritize key hyperparameters for model tuning.
- Continuously refine setup based on real-time data.
- Separate training, validation, and test data sets to ensure robust model evaluation.
Calibration
Calibration ensures that the variance machine vision system delivers accurate and repeatable results. Regular calibration against traceable standards prevents systematic errors and bias. Machine Capability Analysis (MCA) tests and statistical capability validation verify system accuracy. Automated Optical Inspection (AOI) systems use glass boards with etched fiducials for repeated measurements, allowing teams to assess and adjust system performance. Measurement Systems Analysis (MSA), including Type I gauge studies and Gage Repeatability and Reproducibility (Gage R & R), evaluates measurement variation, bias, and repeatability. These methods involve mapping pixel coordinates to real-world units and correcting optical distortions. Machine learning-based calibration methods have achieved sub-micrometer repeatability, confirming their value for real-time inspection of large volume parts.
Calibration benchmarks rely on gauge resolution, where the smallest measurement unit should be about one tenth of the required tolerance band. Sub-pixel algorithms, such as gradient edge analysis, further enhance precision. Telecentric lenses and stable lighting improve feature contrast and reduce distortion. Software with built-in calibration tools detects drift and alerts operators for timely adjustments. Regular recalibration using known targets, like checkerboard patterns, maintains system accuracy within 1% deviation over thousands of cycles.
Note: Comprehensive training programs for calibration, data interpretation, and troubleshooting empower teams to maintain high-quality inspection results.
Software Optimization
Software optimization plays a crucial role in reducing variance and improving the reliability of machine vision systems. Hyperparameter tuning and model optimization techniques, such as pruning and quantization, stabilize inference latency and reduce model size. These improvements are essential for deploying machine learning models in environments with limited resources. Regularization methods, including L2 regularization and dropout, control model complexity and prevent overfitting. Data augmentation, such as cropping, flipping, and noise injection, increases the diversity of the data set and enhances model robustness. Advanced techniques like Self-Residual-Calibration (SRC) regularization and per-example gradient regularization (PEGR) further improve variance control, especially under challenging conditions.
AI-powered predictive maintenance reduces unplanned downtime by monitoring system health and predicting failures before they occur. Johnson & Johnson reported a 50% reduction in downtime after adopting such strategies. Real-time processing and feedback mechanisms allow the system to detect and correct alignment issues instantly. Statistical quality control methods, such as Six Sigma and Total Quality Management, monitor production trends and promote continuous improvement. Software with built-in calibration routines and environmental controls, like stable temperature zones, further minimize system variance.
AI also distinguishes between true defects and harmless variations, reducing false positives and improving prediction accuracy. Continuous monitoring and validation, using metrics like accuracy, precision, recall, and F1-score, ensure that the model remains reliable as the data set evolves. Expert-developed tools, such as Fault Trees and Reliability Block Diagrams, provide structured frameworks for analyzing and improving system reliability.
Key Strategies for Minimizing Variance:
- Start with incremental implementation in targeted areas.
- Invest in team training for calibration and troubleshooting.
- Adopt AI-powered predictive maintenance and real-time feedback.
- Use statistical quality control to monitor and improve processes.
- Optimize software through regularization, augmentation, and hyperparameter tuning.
Callout: Machine vision systems that combine robust hardware, precise setup, regular calibration, and advanced software optimization achieve the lowest variance and highest reliability in 2025.
Understanding and controlling variance in machine vision systems leads to higher accuracy and greater reliability. Experts highlight that metrics like AUC and ROC curves help teams measure system performance and reduce bias. These tools support trustworthy comparisons, especially in fields like medical imaging. Teams that apply best practices see measurable improvements:
- System performance increases
- User adoption grows
- Fewer post-deployment issues occur
- Real-time monitoring predicts and reduces risks
For deeper insights, readers can explore industry standards, research articles, and expert-led training programs.
FAQ
What is the main cause of high variance in machine vision systems?
Lighting changes often cause high variance. Shadows, reflections, and inconsistent illumination make it hard for the system to measure objects accurately. Stable lighting reduces errors and improves repeatability.
How often should teams calibrate a machine vision system?
Teams should calibrate systems regularly, such as once a week or after any hardware change. Frequent calibration ensures accurate and repeatable results.
Can AI help reduce false positives in defect detection?
Yes. AI algorithms learn to distinguish between real defects and harmless variations. This reduces false positives and improves inspection accuracy.
Why does hardware quality matter for variance control?
High-quality cameras and lenses capture more detail. Good hardware reduces measurement errors and keeps results consistent. Teams see fewer system failures with robust equipment.
What metrics help measure variance in machine vision?
Teams use metrics like standard deviation, repeatability coefficient, and Gage R & R. These metrics show how much results change and help track system stability.
See Also
Ensuring Precise Alignment With Machine Vision In 2025
Understanding The Field Of View In Vision Systems
A Comprehensive Guide To Cameras Used In Vision Systems
Comparing Firmware-Based Vision With Traditional Machine Systems
Exploring Computer Vision Models Within Machine Vision Systems
